About Zero Gravity (0G)
-
Zero Gravity is a pioneering data availability system featuring a decentralized storage layer designed for super scalability and security.
-
By segregating data availability workflows into distinct publishing and storage lanes, 0G optimizes scalability through efficient partitioning while ensuring data availability through consensus-based sampling, mitigating broadcasting bottlenecks.
-
Its incentive-based storage mechanism fosters network participation, promoting scalability and enabling support for diverse data types across Layer 2 networks and decentralized AI platforms. network.
Navigation
- Navigation
- Hardware requirements
- Setting up a VPS on Contabo
- Connect to your server
- TrustedPoint Services
- Installation guide
- 1. Install required packages
- 2. Install Go
- 3. Prebuilt
evmosdbinary - 4. Set up variables
- 5. Initialize the node
- 6. Download genesis.json
- 7. Add seeds and peers to the config.toml
- 8. Change ports (Optional)
- 9. Configure prunning to save storage (Optional)
- 10. Set min gas price
- 11. Enable indexer (Optional)
- 12. Create a service file
- 13. Start the node
- 14. Create a wallet for your validator
- 15. Extract the HEX address to request some tokens from the faucet
- 16. Request tokens from the faucet
- 17. Check wallet balance
- 18. Create a validator
- State sync
- Download fresh addrbook.json
- Add fresh persistent peers
- Download Snapshot
- Useful commands
- Check node status
- Query your validator
- Query missed blocks counter & jail details of your validator
- Unjail your validator
- Delegate tokens to your validator
- Get your p2p peer address
- Edit your validator
- Send tokens between wallets
- Query your wallet balance
- Monitor server load
- Query active validators
- Query inactive validators
- Check logs of the node
- Restart the node
- Stop the node
- Upgrade the node
- Delete the node from the server
- Example gRPC usage
- Example REST API query
- Monitoring
- Bonus
Hardware requirements
- Memory: 8 GB RAM
- CPU: 4 cores
- Disk: 500 GB NVME SSD
- Bandwidth: 100mbps Gbps for Download / Upload
- Linux amd64 arm64 (The guide was tested on Ubuntu 20.04 LTS)
Setting up a VPS on Contabo
To get started with installing your node, you’ll first need to rent a VPS (Virtual Private Server). Using a VPS offers several advantages, such as enhanced performance, scalability and reliability. I’ll guide you through the process of renting a VPS at a lower cost, and show you how to configure it. Follow the steps below to get your VPS ready for the node installation.
Contabo is my preferred choice due to their combination of affordable pricing, reliable performance, and user-friendly interface.
Minimum hardware specifications needed for this node:
- Memory: 8 GB RAM
- CPU: 4 cores
- Disk: 500 GB SSD
- Bandwidth: 100mbps Gbps for Download / Upload
- Linux amd64 arm64 (The guide was tested on Ubuntu 20.04 LTS)
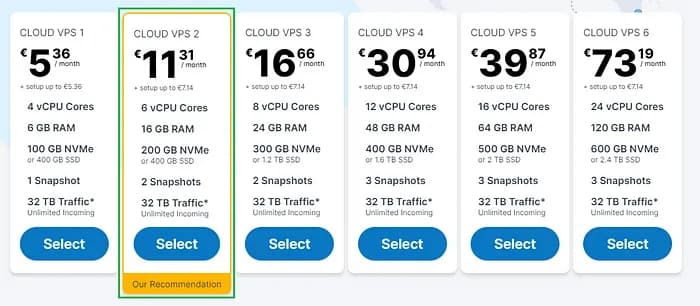
In setting up the node, we’ll follow the recommended hardware guidelines and choose the Cloud VPS 2 package.

I will initially select a rental period of 1 month, with the flexibility to extend it later if needed:

Make sure to choose the option “European Union (Germany)”:

For the best storage solution, I recommend selecting the 400GB SSD storage type:

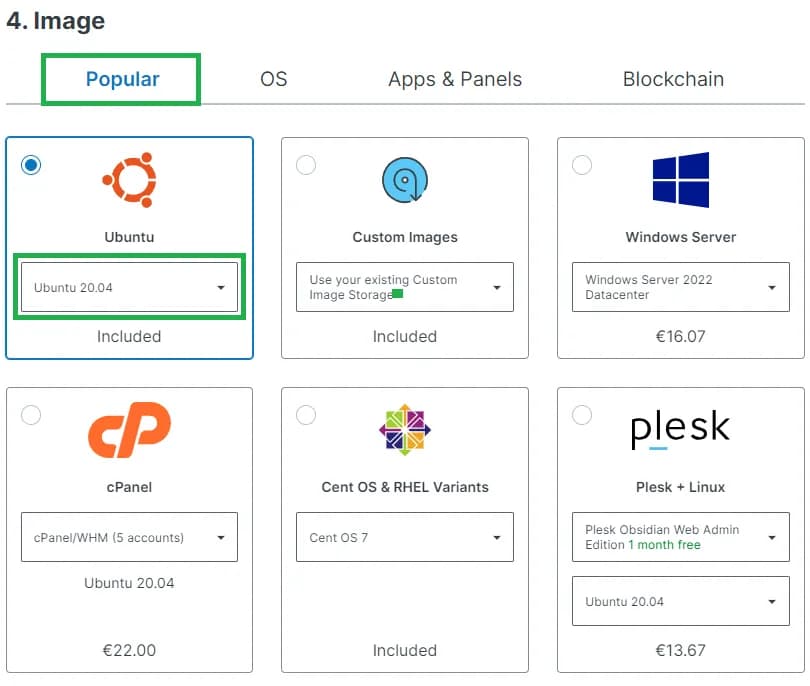
Navigate to either the “Popular” or “OS” tab and choose the standard Ubuntu 20.04 image from there:

To prioritize security, I highly recommend to generate a password and securely store it to ensure maximum protection:

For the final step, it’s recommended to leave the sections titled “Object Storage”, “Networking”, and “Add-Ons” in their default state without any modifications. If you are new to Contabo, please create an account; otherwise, login using your existing credentials. Provide your personal data by filling in the required fields. Complete the remaining fields with your personal information, and click the “Next” button to proceed with the payment. After successfully completing the payment for your order, you will receive an initial email. Within approximately 15–30 minutes, you will receive a second email containing all the information needed to connect to your VPS.
Connect to your server
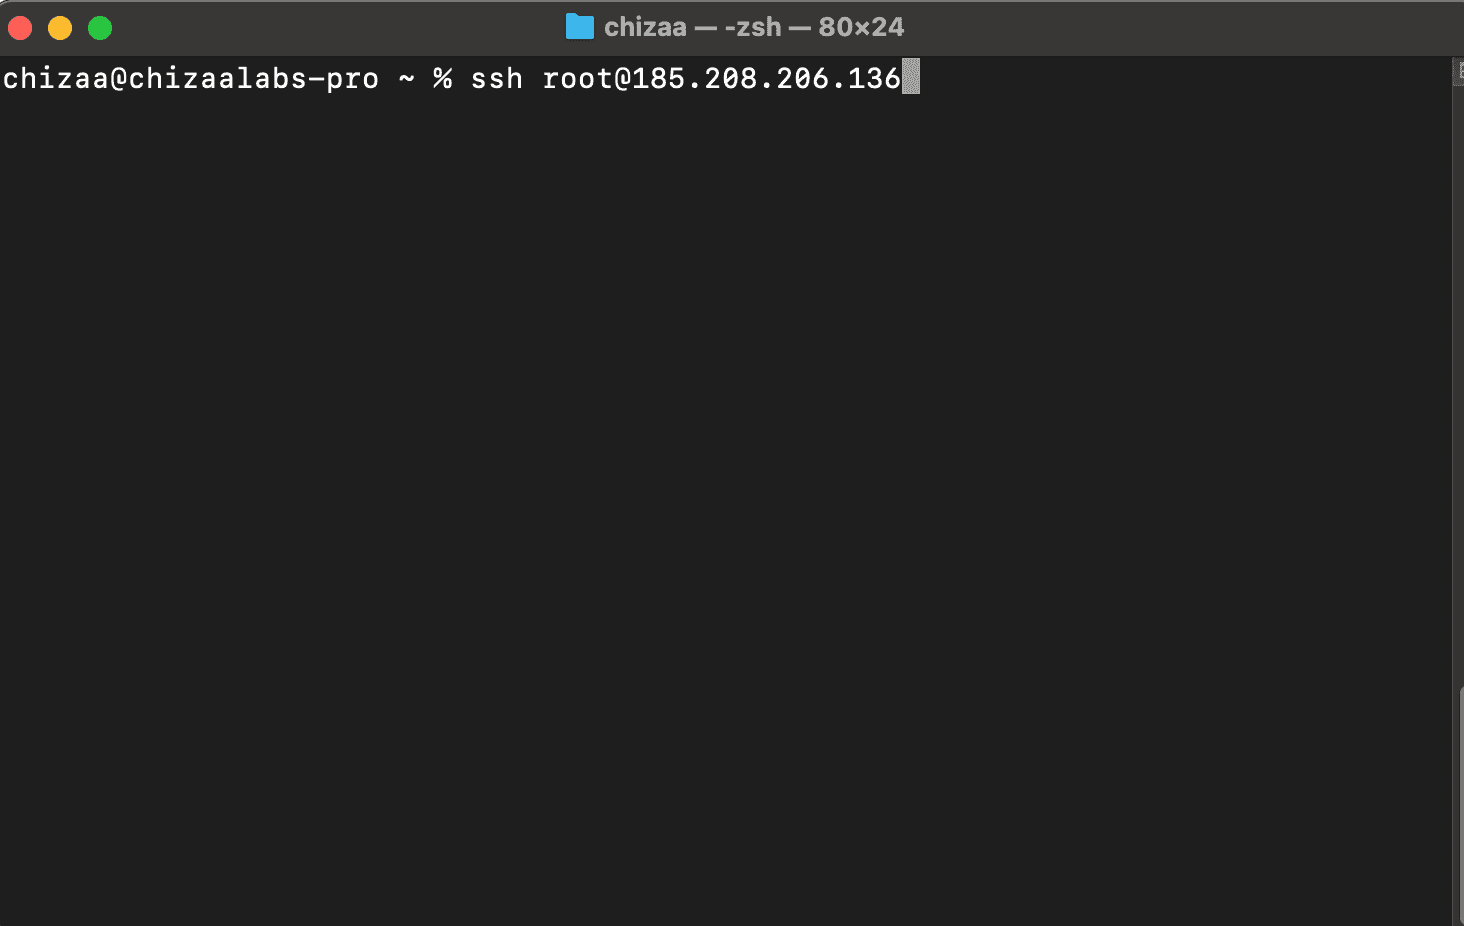
Use the following command to connect to your server:
ssh root@<YOUR-SERVER-IP>

TrustedPoint Services
You can skip this part
parameters:
- parameter: indexing value: kv
- parameter: pruning value: custom (100/50)
- parameter: min-retain-blocks value: 0
- parameter: snapshot-interval value: 2000
- parameter: snapshot-keep-recent value: 2
- parameter: minimum-gas-prices value: 0.00252aevmos
- RPC: https://rpc-zero-gravity-testnet.trusted-point.com:443
- REST API: https://api-zero-gravity-testnet.trusted-point.com:443
- WSS: wss://rpc-zero-gravity-testnet.trusted-point.com:443/websocket
- gRPC: http://grpc-zero-gravity-testnet:9295
- P2P Persistent Peer: 1248487ea585730cdf5d3c32e0c2a43ad0cda973@peer-zero-gravity-testnet.trusted-point.com:26326
- EVM RPC: https://evm-rpc-zero-gravity-testnet.trusted-point.com:443
- State sync: Guide
- Fresh Snapshot: URL / Guide (Being updated every 3 hours)
- Fresh addrbook: URL / Guide (Being updated every 5 minutes)
- Live Peers scanner: URL / Guide (Being updated every 5 minutes)
Installation guide
1. Install required packages
sudo apt update && \
sudo apt install curl git jq build-essential gcc unzip wget lz4 -y
2. Install Go
cd $HOME && \
ver="1.21.3" && \
wget "https://golang.org/dl/go$ver.linux-amd64.tar.gz" && \
sudo rm -rf /usr/local/go && \
sudo tar -C /usr/local -xzf "go$ver.linux-amd64.tar.gz" && \
rm "go$ver.linux-amd64.tar.gz" && \
echo "export PATH=$PATH:/usr/local/go/bin:$HOME/go/bin" >> ~/.bash_profile && \
source ~/.bash_profile && \
go version
3. Prebuilt evmosd binary
wget https://rpc-zero-gravity-testnet.trusted-point.com/evmosd
chmod +x ./evmosd
mv ./evmosd /usr/local/bin/
evmosd version
4. Set up variables
# Customize if you need
echo 'export MONIKER="My_Node"' >> ~/.bash_profile
echo 'export CHAIN_ID="zgtendermint_9000-1"' >> ~/.bash_profile
echo 'export WALLET_NAME="wallet"' >> ~/.bash_profile
echo 'export RPC_PORT="26657"' >> ~/.bash_profile
source $HOME/.bash_profile
5. Initialize the node
cd $HOME
evmosd init $MONIKER --chain-id $CHAIN_ID
evmosd config chain-id $CHAIN_ID
evmosd config node tcp://localhost:$RPC_PORT
evmosd config keyring-backend os # You can set it to "test" so you will not be asked for a password
6. Download genesis.json
wget https://rpc-zero-gravity-testnet.trusted-point.com/genesis.json -O $HOME/.evmosd/config/genesis.json
7. Add seeds and peers to the config.toml
PEERS="1248487ea585730cdf5d3c32e0c2a43ad0cda973@peer-zero-gravity-testnet.trusted-point.com:26326" && \
SEEDS="8c01665f88896bca44e8902a30e4278bed08033f@54.241.167.190:26656,b288e8b37f4b0dbd9a03e8ce926cd9c801aacf27@54.176.175.48:26656,8e20e8e88d504e67c7a3a58c2ea31d965aa2a890@54.193.250.204:26656,e50ac888b35175bfd4f999697bdeb5b7b52bfc06@54.215.187.94:26656" && \
sed -i -e "s/^seeds *=.*/seeds = \"$SEEDS\"/; s/^persistent_peers *=.*/persistent_peers = \"$PEERS\"/" $HOME/.evmosd/config/config.toml
8. Change ports (Optional)
# Customize if you need
EXTERNAL_IP=$(wget -qO- eth0.me) \
PROXY_APP_PORT=26658 \
P2P_PORT=26656 \
PPROF_PORT=6060 \
API_PORT=1317 \
GRPC_PORT=9090 \
GRPC_WEB_PORT=9091
sed -i \
-e "s/\(proxy_app = \"tcp:\/\/\)\([^:]*\):\([0-9]*\).*/\1\2:$PROXY_APP_PORT\"/" \
-e "s/\(laddr = \"tcp:\/\/\)\([^:]*\):\([0-9]*\).*/\1\2:$RPC_PORT\"/" \
-e "s/\(pprof_laddr = \"\)\([^:]*\):\([0-9]*\).*/\1localhost:$PPROF_PORT\"/" \
-e "/\[p2p\]/,/^\[/{s/\(laddr = \"tcp:\/\/\)\([^:]*\):\([0-9]*\).*/\1\2:$P2P_PORT\"/}" \
-e "/\[p2p\]/,/^\[/{s/\(external_address = \"\)\([^:]*\):\([0-9]*\).*/\1${EXTERNAL_IP}:$P2P_PORT\"/; t; s/\(external_address = \"\).*/\1${EXTERNAL_IP}:$P2P_PORT\"/}" \
$HOME/.evmosd/config/config.tomlsed -i \
-e "/\[api\]/,/^\[/{s/\(address = \"tcp:\/\/\)\([^:]*\):\([0-9]*\)\(\".*\)/\1\2:$API_PORT\4/}" \
-e "/\[grpc\]/,/^\[/{s/\(address = \"\)\([^:]*\):\([0-9]*\)\(\".*\)/\1\2:$GRPC_PORT\4/}" \
-e "/\[grpc-web\]/,/^\[/{s/\(address = \"\)\([^:]*\):\([0-9]*\)\(\".*\)/\1\2:$GRPC_WEB_PORT\4/}" $HOME/.evmosd/config/app.toml9. Configure prunning to save storage (Optional)
sed -i.bak -e "s/^pruning *=.*/pruning = \"custom\"/" $HOME/.evmosd/config/app.toml
sed -i.bak -e "s/^pruning-keep-recent *=.*/pruning-keep-recent = \"100\"/" $HOME/.evmosd/config/app.toml
sed -i.bak -e "s/^pruning-interval *=.*/pruning-interval = \"10\"/" $HOME/.evmosd/config/app.toml
10. Set min gas price
sed -i "s/^minimum-gas-prices *=.*/minimum-gas-prices = \"0.00252aevmos\"/" $HOME/.evmosd/config/app.toml11. Enable indexer (Optional)
sed -i "s/^indexer *=.*/indexer = \"kv\"/" $HOME/.evmosd/config/config.toml12. Create a service file
sudo tee /etc/systemd/system/ogd.service > /dev/null <<EOF
[Unit]
Description=OG Node
After=network.target

[Service]
User=$USER
Type=simple
ExecStart=$(which evmosd) start --home $HOME/.evmosd
Restart=on-failure
LimitNOFILE=65535

[Install]
WantedBy=multi-user.target
EOF
13. Start the node
sudo systemctl daemon-reload && \
sudo systemctl enable ogd && \
sudo systemctl restart ogd && \
sudo journalctl -u ogd -f -o cat
P.S. Consider downloading snapshot or using state-sync for the quick sync.
14. Create a wallet for your validator
evmosd keys add $WALLET_NAME

# DO NOT FORGET TO SAVE THE SEED PHRASE
# You can add --recover flag to restore existing key instead of creating
15. Extract the HEX address to request some tokens from the faucet
echo "0x$(evmosd debug addr $(evmosd keys show $WALLET_NAME -a) | grep hex | awk '{print $3}')"Example output:
16. Request tokens from the faucet
17. Check wallet balance
Make sure your node is fully synced unless it won't work.
evmosd status | jq .SyncInfo.catching_upIf your node is in sync, then proceed with the following command:
evmosd q bank balances $(evmosd keys show $WALLET_NAME -a) Example output:
Note: The faucet gives you 1000000000000000000aevmos. To make the validator join the active set you need at least 10000000000000000000aevmos (10 times more)
18. Create a validator
evmosd tx staking create-validator \
  --amount=100000000000000000aevmos \
  --pubkey=$(evmosd tendermint show-validator) \
  --moniker=$MONIKER \
  --chain-id=$CHAIN_ID \
  --commission-rate=0.05 \
  --commission-max-rate=0.10 \
  --commission-max-change-rate=0.01 \
  --min-self-delegation=1 \
  --from=$WALLET_NAME \
  --identity="" \
  --website="" \
  --details="0G to the moon!" \
  --gas=500000 --gas-prices=99999aevmos \
  -y
Do not forget to save priv_validator_key.json file located in $HOME/.evmosd/config/
State sync
1. Stop the node
sudo systemctl stop ogd2. Backup priv_validator_state.json
cp $HOME/.evmosd/data/priv_validator_state.json $HOME/.evmosd/priv_validator_state.json.backup3. Reset DB
evmosd tendermint unsafe-reset-all --home $HOME/.evmosd --keep-addr-book4. Setup required variables (One command)
PEERS="1248487ea585730cdf5d3c32e0c2a43ad0cda973@peer-zero-gravity-testnet.trusted-point.com:26326" && \
RPC="https://rpc-zero-gravity-testnet.trusted-point.com:443" && \
LATEST_HEIGHT=$(curl -s --max-time 3 --retry 2 --retry-connrefused $RPC/block | jq -r .result.block.header.height) && \
TRUST_HEIGHT=$((LATEST_HEIGHT - 1500)) && \
TRUST_HASH=$(curl -s --max-time 3 --retry 2 --retry-connrefused "$RPC/block?height=$TRUST_HEIGHT" | jq -r .result.block_id.hash) && \

if [ -n "$PEERS" ] && [ -n "$RPC" ] && [ -n "$LATEST_HEIGHT" ] && [ -n "$TRUST_HEIGHT" ] && [ -n "$TRUST_HASH" ]; then
    sed -i.bak \
        -e "/\[statesync\]/,/^\[/{s/\(enable = \).*$/\1true/}" \
        -e "/^rpc_servers =/ s|=.*|= \"$RPC,$RPC\"|;" \
        -e "/^trust_height =/ s/=.*/= $TRUST_HEIGHT/;" \
        -e "/^trust_hash =/ s/=.*/= \"$TRUST_HASH\"/" \
        -e "s/^persistent_peers *=.*/persistent_peers = \"$PEERS\"/" \
        $HOME/.evmosd/config/config.toml
    echo -e "\nLATEST_HEIGHT: $LATEST_HEIGHT\nTRUST_HEIGHT: $TRUST_HEIGHT\nTRUST_HASH: $TRUST_HASH\nPEERS: $PEERS\n\nALL IS FINE"
else
    echo -e "\nError: One or more variables are empty. Please try again or change RPC\nExiting...\n"
fi
4. Move priv_validator_state.json back
mv $HOME/.evmosd/priv_validator_state.json.backup $HOME/.evmosd/data/priv_validator_state.json5. Start the node
sudo systemctl restart ogd && sudo journalctl -u ogd -f -o catYou should see the following logs. It may take up to 5 minutes for the snapshot to be discovered. If doesn't work, try downloading snapshot
2:39PM INF sync any module=statesync msg="Discovering snapshots for 15s" server=node
2:39PM INF Discovered new snapshot format=3 hash="?^��I��\r�=�O�E�?�CQD�6�\x18�F:��\x006�" height=602000 module=statesync server=node
2:39PM INF Discovered new snapshot format=3 hash="%���\x16\x03�T0�v�f�C��5�<TlLb�5��l!�M" height=600000 module=statesync server=node
2:42PM INF VerifyHeader hash=CFC07DAB03CEB02F53273F5BDB6A7C16E6E02535B8A88614800ABA9C705D4AF7 height=602001 module=light server=node
After some time you should see the following logs. It make take 5 minutes for the node to catch up the rest of the blocks
2:43PM INF indexed block events height=602265 module=txindex server=node
2:43PM INF executed block height=602266 module=state num_invalid_txs=0 num_valid_txs=0 server=node
2:43PM INF commit synced commit=436F6D6D697449447B5B31313720323535203139203132392031353920313035203136352033352031353320313220353620313533203139352031372036342034372033352034372032333220373120313939203720313734203620313635203338203336203633203235203136332039203134395D3A39333039417D module=server
2:43PM INF committed state app_hash=75FF13819F69A523990C3899C311402F232FE847C707AE06A526243F19A30995 height=602266 module=state num_txs=0 server=node
2:43PM INF indexed block events height=602266 module=txindex server=node
2:43PM INF executed block height=602267 module=state num_invalid_txs=0 num_valid_txs=0 server=node
2:43PM INF commit synced commit=436F6D6D697449447B5B323437203134322032342031313620323038203631203138362032333920323238203138312032333920313039203336203420383720323238203236203738203637203133302032323220313431203438203337203235203133302037302032343020313631203233372031312036365D3A39333039427D module=server
6. Check the synchronization status
evmosd status | jq .SyncInfo7. Disable state sync
sed -i.bak -e "/\[statesync\]/,/^\[/{s/\(enable = \).*$/\1false/}" $HOME/.evmosd/config/config.tomlDownload fresh addrbook.json
1. Stop the node and use wget to download the file
sudo systemctl stop ogd && \
wget -O $HOME/.evmosd/config/addrbook.json https://rpc-zero-gravity-testnet.trusted-point.com/addrbook.json
2. Restart the node
sudo systemctl restart ogd && sudo journalctl -u ogd -f -o cat3. Check the synchronization status
evmosd status | jq .SyncInfoThe file is being updated every 5 minutes
Add fresh persistent peers
1. Extract persistent_peers from our endpoint
PEERS=$(curl -s --max-time 3 --retry 2 --retry-connrefused "https://rpc-zero-gravity-testnet.trusted-point.com/peers.txt")
if [ -z "$PEERS" ]; then
    echo "No peers were retrieved from the URL."
else
    echo -e "\nPEERS: "$PEERS""
    sed -i "s/^persistent_peers *=.*/persistent_peers = \"$PEERS\"/" "$HOME/.evmosd/config/config.toml"
    echo -e "\nConfiguration file updated successfully.\n"
fi
2. Restart the node
sudo systemctl restart ogd && sudo journalctl -u ogd -f -o cat3. Check the synchronization status
evmosd status | jq .SyncInfoPeers are being updated every 5 minutes
Download Snapshot
1. Download latest snapshot from our endpoint
wget https://rpc-zero-gravity-testnet.trusted-point.com/latest_snapshot.tar.lz4
2. Stop the node
sudo systemctl stop ogd3. Backup priv_validator_state.json
cp $HOME/.evmosd/data/priv_validator_state.json $HOME/.evmosd/priv_validator_state.json.backup4. Reset DB
evmosd tendermint unsafe-reset-all --home $HOME/.evmosd --keep-addr-book5. Extract files fromt the arvhive
lz4 -d -c ./latest_snapshot.tar.lz4 | tar -xf - -C $HOME/.evmosd6. Move priv_validator_state.json back
mv $HOME/.evmosd/priv_validator_state.json.backup $HOME/.evmosd/data/priv_validator_state.json7. Restart the node
sudo systemctl restart ogd && sudo journalctl -u ogd -f -o cat8. Check the synchronization status
evmosd status | jq .SyncInfoSnapshot is being updated every 3 hours
Useful commands
Check node status
evmosd status | jqQuery your validator
evmosd q staking validator $(evmosd keys show $WALLET_NAME --bech val -a) Query missed blocks counter & jail details of your validator
evmosd q slashing signing-info $(evmosd tendermint show-validator)Unjail your validator
evmosd tx slashing unjail --from $WALLET_NAME --gas=500000 --gas-prices=99999aevmos -yDelegate tokens to your validator
evmosd tx staking delegate $(evmosd keys show $WALLET_NAME --bech val -a) <AMOUNT>aevmos --from $WALLET_NAME --gas=500000 --gas-prices=99999aevmos -y
Get your p2p peer address
evmosd status | jq -r '"\(.NodeInfo.id)@\(.NodeInfo.listen_addr)"'Edit your validator
evmosd tx staking edit-validator --website="<WEBSITE>" --details="<DESCRIPTION>" --new-moniker="<NEW_MONIKER>" --identity="<KEY BASE PREFIX>" --from=$WALLET_NAME --gas=500000 --gas-prices=99999aevmos -y
Send tokens between wallets
evmosd tx bank send $WALLET_NAME <TO_WALLET> <AMOUNT>aevmos --gas=500000 --gas-prices=99999aevmos -y
Query your wallet balance
evmosd q bank balances $(evmosd keys show $WALLET_NAME -a)Export your private key in order to add it to metamask
evmosd keys unsafe-export-eth-key $WALLET_NAMEMonitor server load
sudo apt update
sudo apt install htop -y
htop
Query active validators
evmosd q staking validators -o json --limit=1000 \
| jq '.validators[] | select(.status=="BOND_STATUS_BONDED")' \
| jq -r '.tokens + " - " + .description.moniker' \
| sort -gr | nl
Query inactive validators
evmosd q staking validators -o json --limit=1000 \
| jq '.validators[] | select(.status=="BOND_STATUS_UNBONDED")' \
| jq -r '.tokens + " - " + .description.moniker' \
| sort -gr | nl
Check logs of the node
sudo journalctl -u ogd -f -o catRestart the node
sudo systemctl restart ogdStop the node
sudo systemctl stop ogdUpgrade the node
cd 0g-evmos
git fetch
git checkout tags/<version>
make install
evmosd version
# Restrt the node
sudo systemctl restart ogd && sudo journalctl -u ogd -f -o cat
Delete the node from the server
# !!! IF YOU HAVE CREATED A VALIDATOR, MAKE SURE TO BACKUP `priv_validator_key.json` file located in $HOME/.evmosd/config/
sudo systemctl stop ogd
sudo systemctl disable ogd
sudo rm /etc/systemd/system/ogd.service
rm -rf $HOME/.evmosd $HOME/0g-evmos
Example gRPC usage
wget https://github.com/fullstorydev/grpcurl/releases/download/v1.7.0/grpcurl_1.7.0_linux_x86_64.tar.gz
tar -xvf grpcurl_1.7.0_linux_x86_64.tar.gz
chmod +x grpcurl
./grpcurl  -plaintext  localhost:$GRPC_PORT list
### MAKE SURE gRPC is enabled in app.toml
# grep -A 3 "\[grpc\]" /home/og-testnet-validator/.evmosd/config/app.toml
Example REST API query
curl localhost:$API_PORT/cosmos/staking/v1beta1/validators
### MAKE SURE API is enabled in app.toml
# grep -A 3 "\[api\]" /home/og-testnet-validator/.evmosd/config/app.toml
Monitoring
To enhance the observability and monitoring of your nodes and network status, you are encouraged to utilize our public dashboard. This platform offers real-time insights and analytics, enabling you to track performance, identify potential issues, and make informed decisions for optimal network health.
Bonus
Below is a guide to get more tokens to delegate to your node from the faucet in order to be among top active validators.
-
Install Windscribe VPN
-
Have multiple wallets in your metamask.
-
Keep making a request to the faucet with a different wallet address each time you change the location of the VPN.
-
Send the tokens to your node wallet.
-
Delegate the tokens to your node.